Here’s a photo of the finished spring tulip bouquet for my front door. It’s an explosion of color. Isn’t it gorgeous?
Category: Lifestyle
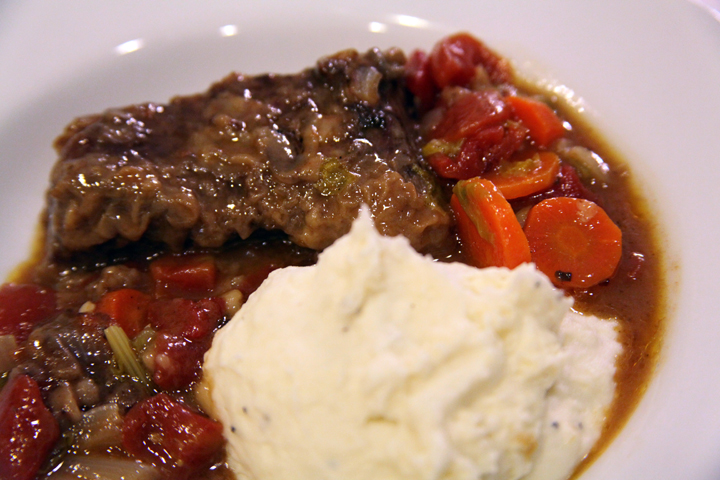
Braised Short Ribs
It’s been cold and rainy this week, so cold that I’ve been craving a hearty, stick-to-your-ribs type of meal. So I turned to this recipe for braised short ribs that my mom made frequently when I was growing up. It’s simple to make, smells amazing while it’s baking, and tastes even better. This recipe is comfort food at its best. I like to serve braised short ribs with mashed potatoes and spoon the vegetables and sauce on top of the potatoes. Look for boneless short ribs at your supermarket if you can find them because it makes eating this dish a bit easier. I grab boneless short ribs as I find them and freeze them for later use. Here are the ingredients you’ll need to make braised short ribs:
Braised Short Ribs Ingredients
- 3 lbs. beef short ribs (preferably boneless)
- 3-4 tablespoons flour (enough to coat the ribs)
- 3-4 tablespoons vegetable oil (enough to brown the ribs on all sides)
- 1/2 cup water
- 1 can (28-oz.) diced tomatoes with juice
- 1/2 cup carrots, thinly sliced
- 1 cup onions, chopped
- 1/2 cup celery tops, chopped (the celery leaves really make this dish)
- 1 clove garlic, minced
- Salt and pepper to taste
- 3 tablespoons additional flour (to thicken the broth)
Instructions
- Dredge the short ribs in flour and brown them on all sides in a frying pan coated with hot oil.
- Place ribs in a 9 x 13″ baking pan.
- Drain off excess oil from the frying pan, keeping the browned bits on the bottom of the pan. Return the pan to the heat. Add water and bring to a boil, scraping the browned parts off the bottom of the pan.
- Add the remaining ingredients (except flour). Bring to a boil. Combine flour with enough water to make a thin paste. Add slowly to the boiling mixture, stirring constantly until thickened.
- Pour the vegetable mixture over the short ribs in the baking pan. Cover and bake at 350 degrees for 1.5 to 2 hours, or until the meat is fork tender. Serve with hot mashed potatoes or hot cooked rice.
Ladle into a bowl, spoon the vegetables and sauce over the mashed potatoes, and enjoy!
Canine Gardening Assistants
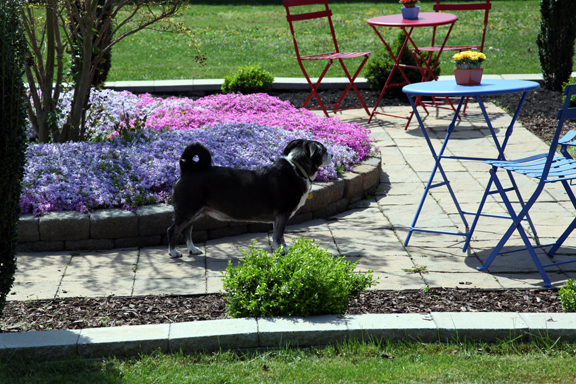
Yard work is always more pleasant when you have canine garden helpers. Marty (aka “Piggy” because of his curly pig tail) likes to dig holes, graze on the grass, sit in the phlox, and identify shady spots in the yard. He also likes to inspect my work. Mary, who is a more refined and dignified dog, prefers to oversee the yard work from the comfort of the deck.
Colorful Spring Garden
I hope you all enjoyed your weekend. I spent my weekend doing yard work–mowing, edging, weeding, mulching, trimming shrubs, and removing plants that didn’t survive the winter. It was a lot of work clearing away winter’s neglect and readying my garden for the arrival of spring blooms like this creeping phlox, but it was well worth the effort. Just look at this spectacular show. What’s growing in your garden this spring?
Work in Progress–Pink Miltonia Orchids
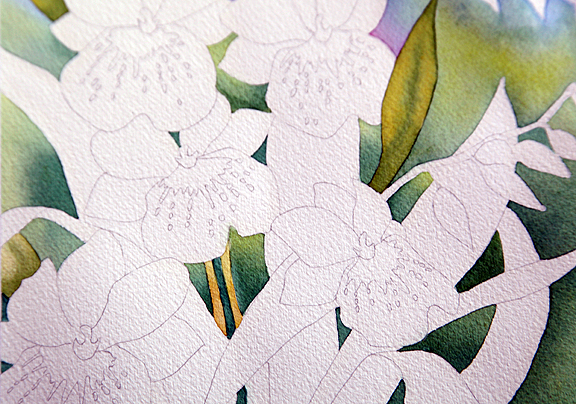
Here’s a peek at my latest painting. I hope to finish it this evening. I’ve been so busy with spring cleaning and home improvement projects that I’ve had little time to paint. I have several interior decorating projects underway, porch and deck makeovers in progress, a massive yard cleanup, custom curtains to sew, and a few painting tasks to complete–some involving plenty of spray paint (you know how much I love spray paint). Oh, and lots of fun shopping with my mom. I can’t wait to finish all these projects and share the results with you.
I hope you’re enjoying the warm spring weather as much as I am.
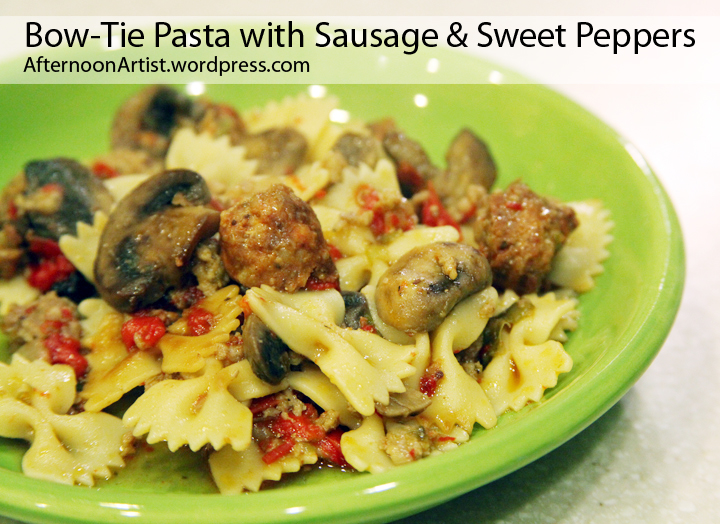
Bow-Tie Pasta with Sausage and Sweet Peppers
If you like sausage, you’re going to love this savory pasta. This dish is packed full of flavor–with two types of sausage, tons of fresh mushrooms, green and red peppers, onions, garlic, and beef broth, it’s a party in your mouth. I’ve been serving this dish for years and it always receives rave reviews. I found the original recipe in Better Homes and Gardens Magazine but I’ve changed it significantly over the years. Here are the ingredients you’ll need to make bow-tie pasta with sausage and sweet peppers:
Ingredients
- 1 lb. bow tie pasta
- 3/4 lb. spicy Italian sausage, casings removed and cut into bite-sized pieces
- 1 lb. bulk sausage
- 1 medium red pepper, seeded and chopped
- 1 medium green pepper, seeded and chopped
- 1 medium onion, peeled and diced
- 2-3 garlic cloves, peeled and minced
- 2 packages fresh mushrooms, cleaned and sliced
- 1 can beef broth
- 1/4 teaspoon freshly ground black pepper
- Grated parmigiano reggiano cheese
Instructions
- In a large saucepan cook the pasta according to package directions; drain. Return pasta to the saucepan.
- Meanwhile, remove the casings from the Italian sausage and cut it into bite-sized pieces. In a very large skillet (or wok) cook the Italian sausage, ground sausage, red and green peppers, onions, garlic, and mushrooms over medium-high heat until the sausage and mushrooms are browned. Drain well.
- Stir the beef broth and black pepper into the skillet, scraping the bottom of the pan to loosen the browned bits. Bring to boiling; reduce heat. Simmer, uncovered, for 5 minutes. Remove from heat. Pour over the pasta. Toss gently to coat. Top with freshly grated parmigiana reggiano cheese.
- Enjoy!
Rose Petal Fairy iPad Case
My daughter surprised me with this lovely iPad case featuring my rose petal fairy yesterday. She ordered it from CafePress. I like that the image is a full bleed and that it’s printed on both sides of the case. If you’re not familiar with CafePress, hop on over there and check it out. You can have your artwork produced on hundreds of items like business cards, thank you notes, coffee mugs, household goods, apparel, computer accessories, jewelry, and lots more.
You can create a private shop and purchase items for yourself or open a public shop (similar to an Etsy shop) and sell products featuring your artwork to anyone wishing to purchase them. I spent the evening creating a shop, now I have to get busy and fill it full of goodies.
Baby Fairy in Watercolor
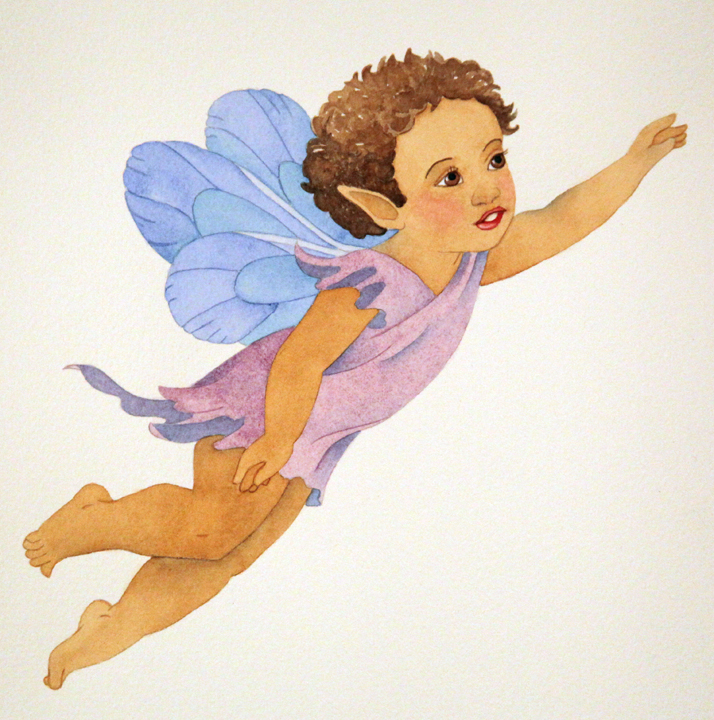
I painted this baby fairy during our last mother-daughter painting session. She was a quick study on darker skin tones . I’m particularly pleased with her curly hair, which I painted with quick strokes and in a much looser style than I normally paint. This painting is based on a tutorial in Barbara Lanza’s book, “Enchanting Fairies: How to Paint Charming Fairies and Flowers.”
Easy Last-Minute Easter Centerpiece
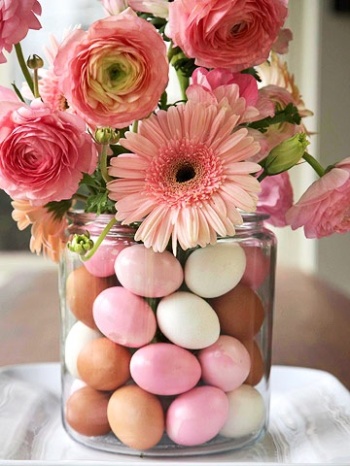
I clipped this idea out of Better Homes and Garden’s Creative Home Magazine way back in the spring of 2007 and just came across it again today while I was doing some spring cleaning. It’s such a lovely and simple idea that I thought I’d share the goodness here. Many of you have colored your eggs by now, so you’ve already completed the bulk of the work and could easily feature this lovely arrangement on your Easter table.
Instructions:
Color hard-boiled eggs in shades of pink and brown (leave some of them white). Center a drinking glass or a candle sleeve inside a large-mouth jar and carefully stack eggs between the glass and jar, alternating the egg colors. Fill the glass with water. Cut rose, ranunculus, and gerbera stems to desired lengths and place them in the glass. Fill in with anemones as needed.
How easy is that? (Photos from Better Homes and Gardens)
Miltonia Orchids in Watercolor
My daughter painted these gorgeous miltonia orchids during a recent late night mother-daughter painting session. I love the bits of white she left on the edges of the petals and the one bright white flower to the left of the center of the painting she chose as her focal point. And of course I love the bright, highly saturated colors.
This painting was based on a tutorial in Ann Mortimer’s newly released book, “Orchids in Watercolor.”

