Author: Jill Krafsig

Fireplace Makeovers–One Fireplace Three Ways

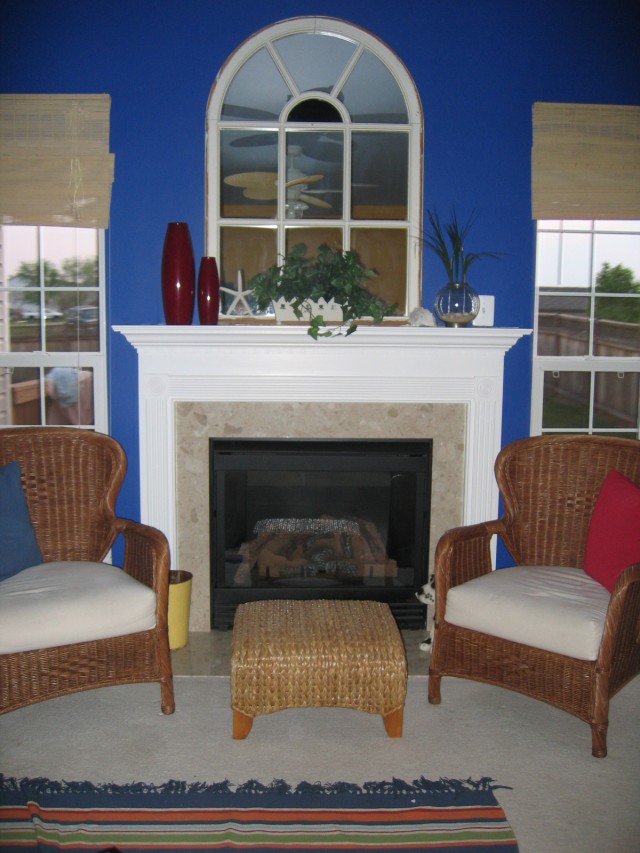
Navy blue fireplace makeover

Aqua fireplace makeover

Fireplace makeover in light blue

I’ve been hard at work overhauling my blog this week to make it more user friendly and give it a fresh new look. What do think of my new design? I’m really liking the touches of fresh lime.

While going through old posts I found these photos of my fireplace featuring several different shades of blue and thought I would share them today. I frequently repaint my rooms. Repainting a room is one of the most economical decorating tricks up a decorator’s sleeve. The change is always dramatic and all it takes is one afternoon of work and about $150.00 per room.

Which color is your favorite, the navy, the aqua, or the light blue?

Poppies in Watercolor

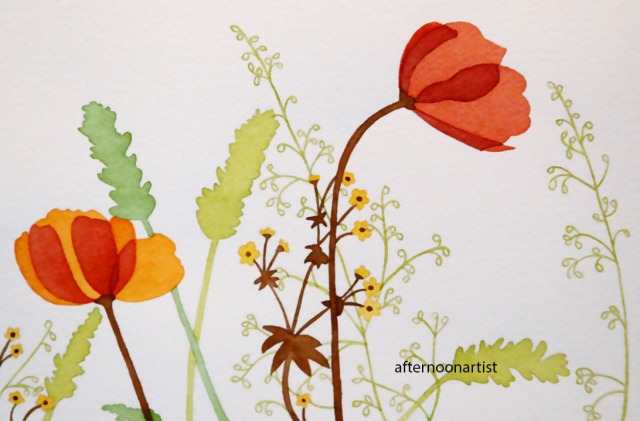
poppies in watercolor

Keeping things simple today. No shading, no fancy watercolor tricks, just plain, solid color on a white background. The keep-it-simple (KISS) rule always works. This painting–which was inspired by a pillow case that caught my sister’s eye–is for my sister’s new home. She wants to add a touch of orange in every room, and I’m happy to oblige. I can’t wait to pull up a chair and have a cup of coffee with my sissy in her new kitchen.

What’s Cooking–Cheeseburger Rice

Cheeseburger rice recipe

I love cheeseburgers. I mean, who doesn’t love a good burger? I like mine served on a potato bun topped with mayo, ketchup, lettuce, tomato, and onion. Sometimes, I prefer to keep things simple and top my burger with just a squirt of ketchup and yellow mustard. Other times, I like to recreate a favorite fast food burger, like this copycat Roy Rogers Double-R-Bar burger.

When it comes to cheeseburgers, I also like to think outside the bun. This cheeseburger salad is one of my favorites. So is this recipe for cheeseburger rice. The original recipe was created by Kraft foods, but I’ve adapted it to suit my taste. Adults like it, kids LOVE it, it takes just 10 minutes to prepare, and clean up is a breeze–there’s only one skillet to clean. Here’s what you’ll need to make cheeseburger rice:

Ingredients

  • 1 medium onion, peeled and chopped
  • 1 lb. lean ground beef
  • 1 3/4 cups water
  • 1 cup ketchup
  • 2 heaping tablespoons prepared yellow mustard
  • 2 cups instant white rice
  • 1 cup shredded cheddar cheese

Directions

In a large skillet, brown meat and onions over medium heat; drain. Add water, ketchup, and mustard. Stir in rice. Sprinkle with cheese; cover. Cook on low heat for 5 minutes, or until the rice is tender.

Fall Fun at the Cows-N-Corn Dairy Farm

A tour of the Cows-N-Corn dairy Farm

I love Fauquier County in the fall.  I love warm afternoons and chilly nights, changing leaves and clear blue skies, fall festivals and funnel cakes, fish frys and country music, and afternoons spent picking apples and touring local dairy farms. This past weekend we visited the Cows-N-Corn dairy farm in Midland, Virginia.

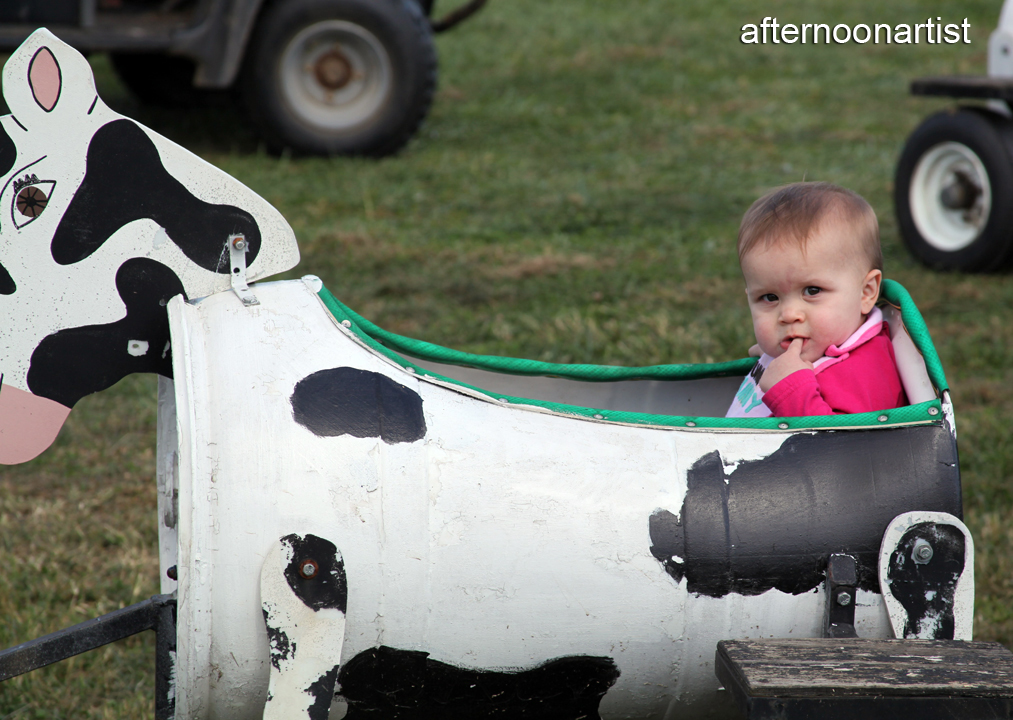
My daughter and her friends had a blast running through the corn maze, taking hay rides, petting the farm animals, and riding in the cow carts. After spending the evening going through the photos,  I suddenly have a hankering for a cup of hot apple cider–or a Starbuck’s caramel apple spice–YUM! Here are some more photos.

Cows-N-Corn dairy farm

Cow carts

Cow carts

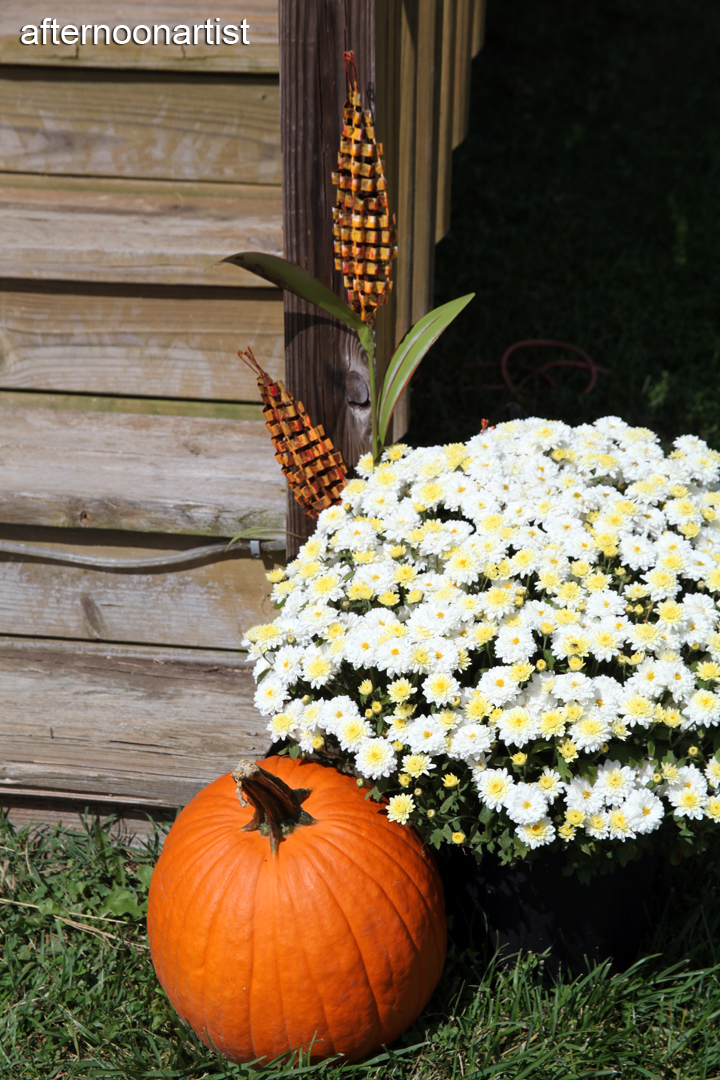
Pumpkins and corn

Scarecrow

Corn stalks and blue skies

Dried corn

Pumpkins

Corn maze

Simple pleasures are the best.

Night Fairy in Watercolor

Night fairy in watercolor

I’m just getting back in the groove of painting and blogging after a seriously relaxing three-week-long vacation. I had to break back into blogging slowly–I didn’t want to shock my system after doing a whole lot of nothing, LOL! This is another painting that I thought I could complete quickly but it took way longer than I anticipated. I worked on this moon flower fairy for four days. The pearls in her hair were quite time consuming and tedious to paint–they are tiny. This painting is based on a tutorial in the book, “Enchanting Fairies–How to Paint Fairies and Flowers,” by Barbara Lanza.

Here’s a close-up view of her face:

Night fairy closeup

Yellow and Orange Tulips in Watercolor

yellow and orange tulips

This tulip painting looks deceptively simple but it was time consuming and challenging to paint. I found the giant tulip on the left to be particularly challenging since I had such a large area to cover. The orange areas on the tulips required several washes to create an intense color. I painted the yellow areas first and then washed the orange on top; however, the next time I will reverse the process and paint the dark orange first and then apply a yellow wash on top. Each painting is a learning process.

This painting is for my sister with much love.

Copycat Roy Rogers Double-R-Bar Burger

Copycat Roy Rogers DoubleRBar Burgers

Dinner Brought to You by Roy Rogers, Martha Stewart, Julia Childs, the Bealeton Farmer’s Market, My Sister, and Me!

My sister and I spent a week together relaxing and doing what we like to do best–chatting for hours; touring Main Street in Warrenton, Virginia;  browsing through antique shops; shopping at the Bealeton farmer’s market; and cooking the fresh fruits and vegetables we purchased there. I took the opportunity to introduce my sister to my copycat version of Roy Rogers Double-R-Bar burgers. I haven’t seen a Roy Rogers restaurant in years, and I really had a craving for a good, ole’ Double-R.

My sister whipped up a batch of green beans almondine ala Julia Childs and I whipped up a batch of Mexican corn on the cob ala Martha Stewart. The burgers were fabulous–we topped them with shaved ham, cheddar cheese, BBQ sauce, mild horseradish sauce, and coleslaw–and the green beans and corn on the cob were out of this world. We rounded out the meal with the best cantaloupe we’d had all season. It was such a fabulous late summer meal that I just had to share it with all of you.

There’s still one more week before summer is over and the kids have go back to school. If you’re looking for a fabulous Labor Day meal to share with your family or friends, this combination is a must try. Recipes are provided below.

Copycat Double-R-Bar Burger Ingredients

  • Lean ground beef
  • Shaved ham
  • Sliced cheddar cheese
  • Barbeque sauce
  • Mild horseradish sauce
  • Coleslaw (optional)
  • Hamburger buns (I used Martin’s potato buns–my fave)

In a large skillet, cook the burgers over medium heat until they cooked medium well (no pink in the center). Top the burgers with two slices of shaved ham and a slice of cheddar cheese. Cover and allow the cheese to melt. Place on buns and top with BBQ sauce, horseradish sauce, and coleslaw.

Green Bean Almondine Ingredients

  • Fresh, whole green beans
  • 3 tablespoons butter
  • 1 cup slivered almonds
  • Salt and pepper to taste

Clean and snap the ends off of the green beans. Cook in a skillet with a small amount of water until the beans are crisp tender (about five minutes). Drain, remove from the pan, and set aside. Add the butter and slivered almonds to the pan. Cook, stirring constantly, until the almonds are golden brown (about three minutes). Add the green beans back to the skillet; stir to coat. Cook until heated through.

Mexican Corn on the Cob Ingredients

  • Grated Parmesan cheese
  • Corn on the cob, husks removed
  • Butter
  • Coarse salt and freshly ground pepper
  • Mayonnaise
  • Chili powder
  • Lime wedges

Rub the corn with butter then sprinkle with salt and pepper. Wrap each ear in plastic wrap. Microwave until crisp tender (about 1-2 minutes for two ears). Remove plastic wrap. Brush corn with mayonnaise and roll in Parmesan cheese to coat. Sprinkle with chili powder. Serve with lime wedges. Enjoy!

Water Lilies in Watercolor

Water lilies in watercolor

My goal for this painting was to keep the subject simple so I could complete it quickly. But looks can be deceiving, and these water lilies proved to be quite time consuming and challenging. It took me several attempts to render realistic dew drops but I finally began to nail them on the leaf on the bottom right-hand corner. Once I figured out the technique, painting dew drops was surprisingly quick and easy.

The swampy water, on the other hand, was even more challenging. It’s definitely not what I envisioned; and I obviously need more practice painting water. If anyone has any tips or tricks for painting water that they’d like to share, I’m all ears!

This painting was based on a tutorial in Linda Ravenscroft’s book, “How to Draw and Paint Fairyland: A Step-by-Step Guide to Creating the World of Fairies.”

Pink and White Outdoor Chevron Rugs–You Had Me At Hello

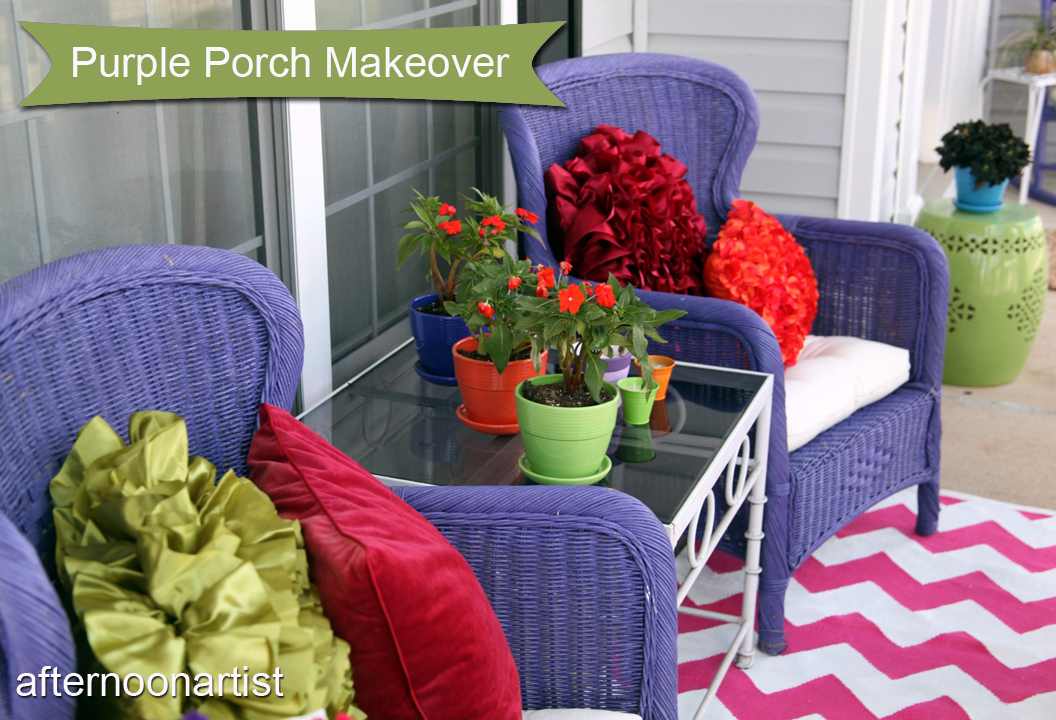
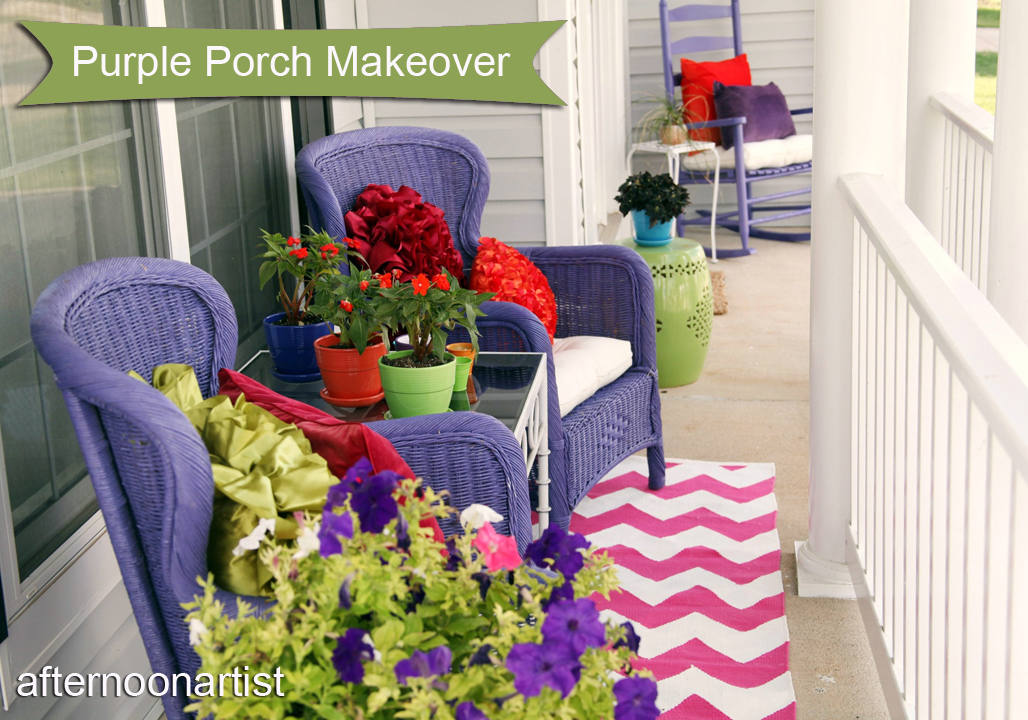
Purple porch makeover

You Had Me At Hello
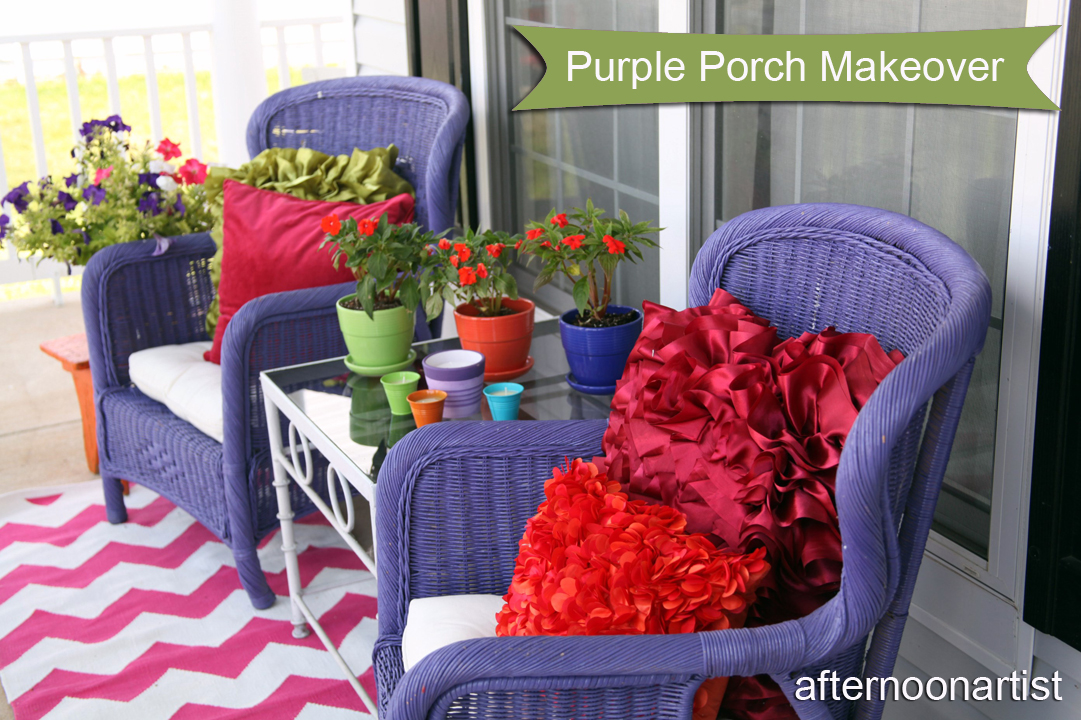
It was love at first sight when I found these pink and white chevron rugs by designer Annie Selke on the Dash and Albert website last spring. I was in the middle of planning a spring porch makeover and was looking for colorful outdoor rugs to complement my purple wicker chairs, gemstone colored pillows, and colorful accessories. So the moment I saw these pink and white beauties I threw down my money and did a happy dance. The rugs were on back order but that was fine; it was early in the season so I had plenty of time to pull my porch together.

But my happy dance was short lived when the estimated delivery date for my order was delayed until June, and then delayed again until July, and then again in August. I considered cancelling my order and began a search for a suitable replacement but I couldn’t find anything else that rocked my world. So I waited, and waited, and waited for my rugs to arrive, and pulled my porch together without the rugs. It was a nice makeover, but the porch looked unfinished without the rugs.

You Complete Me
Last week my rugs finally arrived so I swept the porch, dusted the furniture, cleaned the cushions, ran out to a nursery and picked up a few flowers and planted them in colorful pots and finally–FINALLY–my porch makeover is complete. This makeover was a long time coming but oh so worth the wait. Dash and Albert, rugs you complete me. Here are a few more pictures.

Purple porch makeover

Purple porch makeover

Purple porch makeover

Aren’t these pink and white chevron rugs the bomb?

DIY Footstool Makeover

DIY_Footstool_Makeover

In the evening after all my household chores are done,  I like to pour myself a cup of coffee, throw on my jammies, prop my back against some fluffy pillows, and work on my blog from the comfort of my bed. Sounds fabulous, right? But the problem with this scenario is that I’ve been getting way too comfy and I keep falling asleep and waking up in the middle of the night with the TV still on, the laptop on my lap, and a half-written post. My solution? Create a comfy blogging spot in my room–but not too comfy, so I won’t fall asleep!

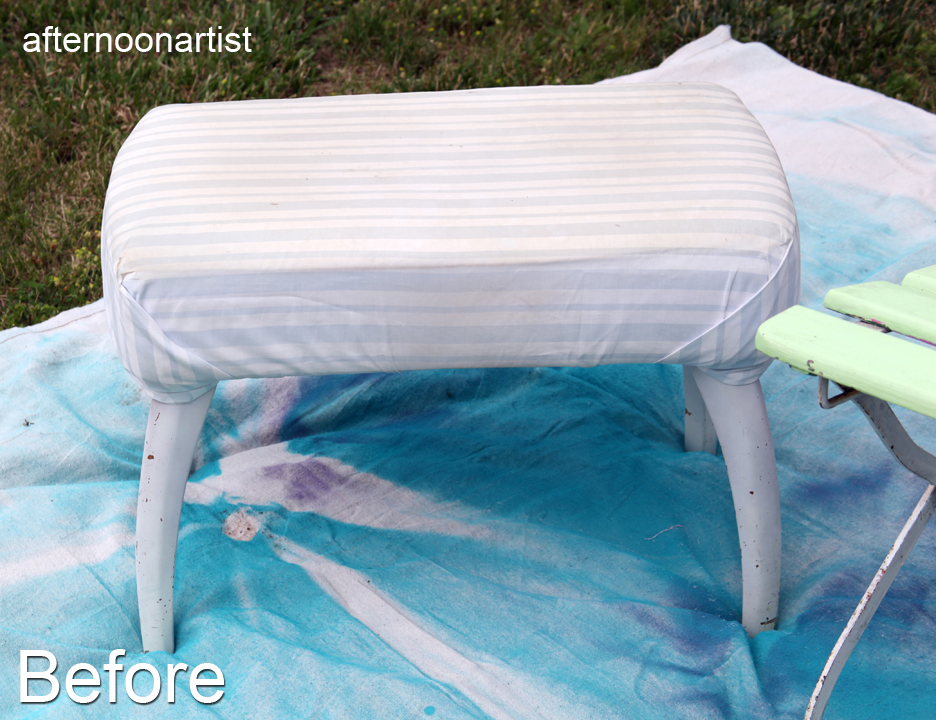
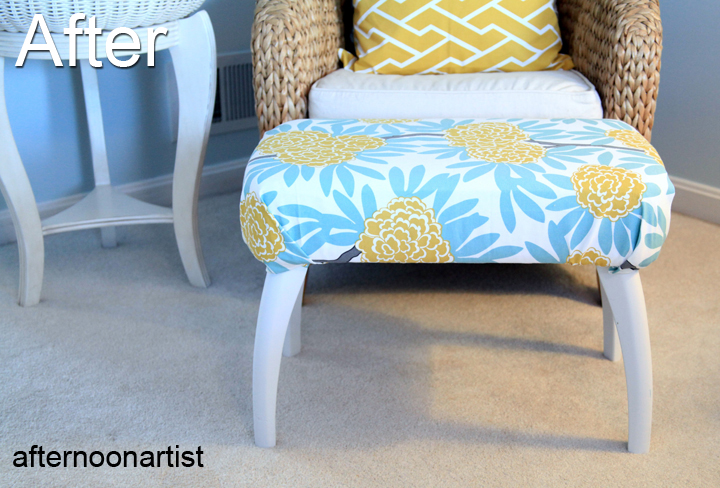
So, with that goal in mind, last weekend I did a quick DIY footstool makeover so I can prop my feet up, sip on a cup of coffee, and work on my blog without dozing off. My budget for this makeover: a mere $25.00. Here are some before and after photos (don’t you just love before and after photos?).

Footstool makeover before

This footstool was a freebie from a friend. It had seen better days–the fabric was dirty and worn and the legs were scuffed and chipped. But it was sturdy and had good bones and I knew that a quick makeover could take this charming little stool from trash to treasure. So with a can of spray paint leftover from another project in one hand (cost: $0)  and a half yard of designer fabric in the other (cost: $25), I transformed this stool in one afternoon.

First, I removed the worn fabric, then I lightly sanded and cleaned the legs so the paint would adhere properly. Next, I gave it two light coats of spray paint to prevent the paint from dripping and then allowed the paint to dry thoroughly. It’s important to wear a mask and choose a well ventilated area when using spray paint. I normally throw a tarp on the lawn and spray paint outside, or if it’s a particularly windy day, I paint inside the garage with the door open.

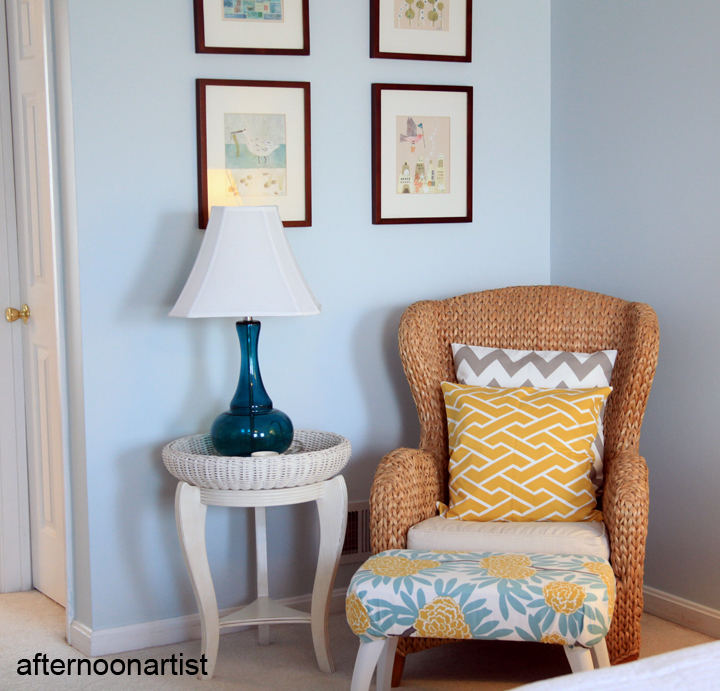
Once the paint was dry (about an hour is all it takes), I cut a piece of fabric (mustard fleur chinoise from Caitlin Wilson Textiles) to fit the top of the stool, folded the corners to fit around the legs, then stapled the fabric to the underside of the frame using a nail gun. What a difference a little spray paint and a half yard of fabric makes! Here’s a close up view.

footstool makeover after

To complete my new blogging space, I shopped my house and placed this cute little wicker table next to the chair so I have a handy place to put my coffee and added this pretty aqua lamp that I bought at Target last year. The end result of a couple of hours of work: this cute little blogging nook, no dozing while I work, AND this completed post.

DIY_Footstool_Makeover

Where’s your favorite blogging spot?

%d bloggers like this: